WHAT WE DO
Epsilon provides
end to end services for all of your precision engineering and prototyping needs
Our multi-discipliniary team of designers, engineers and machinists are here to supports your needs in a completley ‘end to end’ focused process. Levering powerful AI and Generative modeling, we are able to assist in all aspects of work. One of our core principles that is pervasive within the etho of the company is to refer to our clients as PARTNERS,
GET STARTED TODAY


WHAT WE OFFER
EPSILON PRECISION offers a wide range of services delivered with excellence and quality in mind

Electronics and Software
Our unique approach and multi-discipliniary team allows us to occupy a very nieche sector of the market, where we are able to offer our partners an true end to end service for all of their requirements.

Advanced CNC Capability
CNC capability does not start by loading stock, it’s a holistic process, from design to CAM to manufacturing we use only the latest technology and lever the power of AI wherever possible to ensure we provide the best outcome for our partners

Design to Delivery
Depending on wherever you are in your design and delivery cycle, we have the capability and capacity to help you deiver what you need, when you need it.
Precison Engineering
One of the key aspects of precision engineering is its ability to produce components with exceptional precision and reliability. This is crucial in industries such as aerospace, automotive, medical devices, electronics, and many more, where even the smallest deviations can have a significant impact on performance, safety, and overall quality.
Precision engineering encompasses a wide range of techniques and methodologies, including computer-aided design (CAD), computer numerical control (CNC) machining, additive manufacturing (3D printing), and metrology. These technologies enable engineers to create complex geometries, intricate patterns, and micro-scale features that were once unimaginable.


Prototyping
With our comprehensive suite of prototyping services, including 3D printing, CNC machining, and Electronics, we ensure that you have access to the latest advancements in the field. Our streamlined processes and meticulous attention to detail guarantee fast turnaround times without compromising on quality.
Partnering with Epsilon Precision means gaining a trusted ally that is dedicated to your success. We work closely with you throughout the prototyping journey, offering expert guidance and support to help you refine your designs and optimize your product for manufacturing.
OUR WORK
Portfolio
Our portfolio of work spreads across muliple industries demonstrating our electronics and precision engineering
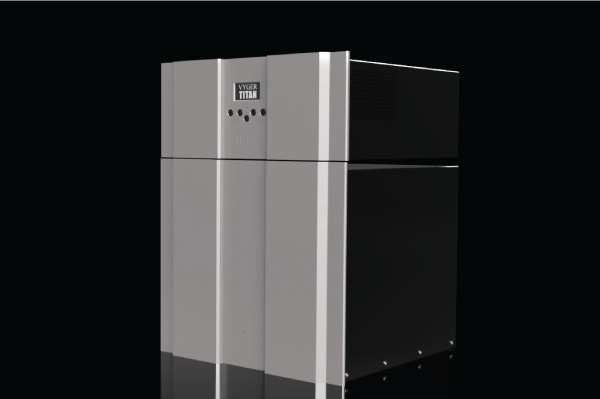
VYGER TITAN
The VYGER TITAN is a machine learning pneumatic supply system for ‘high end’ audio applications. Epsilon created the enitre ‘end to end’ prototype including the software. This technology is completely proprietary and does not exist anywhere else in the world.
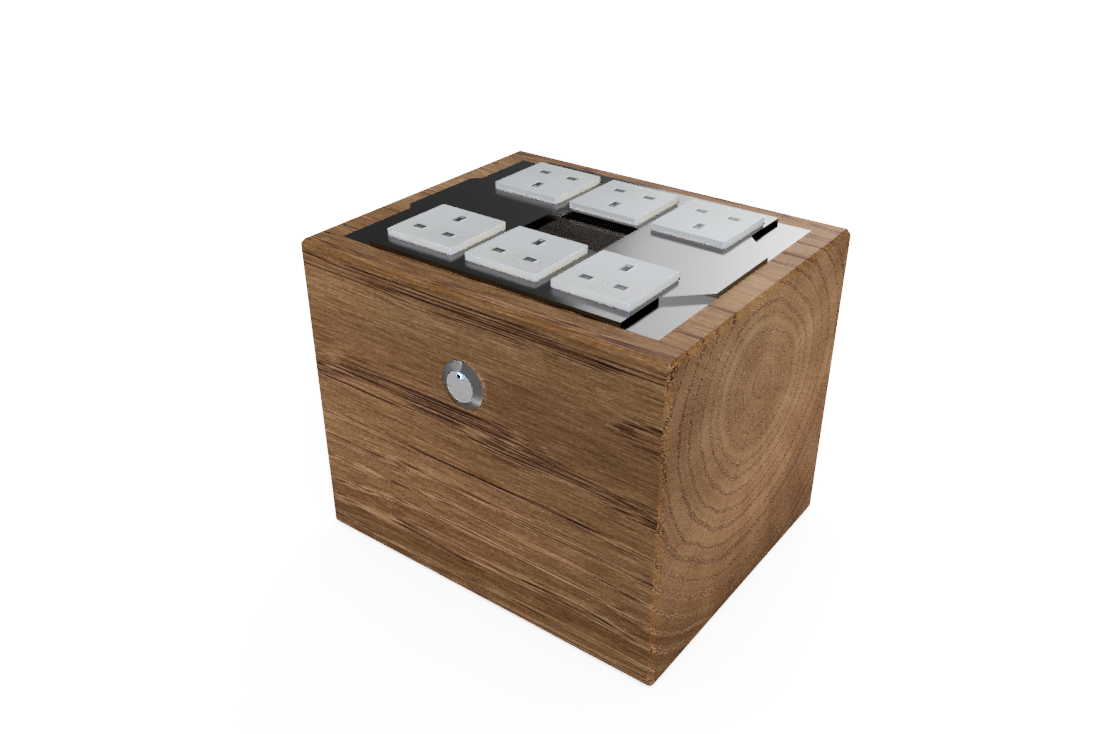
POWERLINE FILTER
A mains poweline filter for cross industry applicantion removes both common mode and differential noise from the powerline of systems that require a very precise supply.
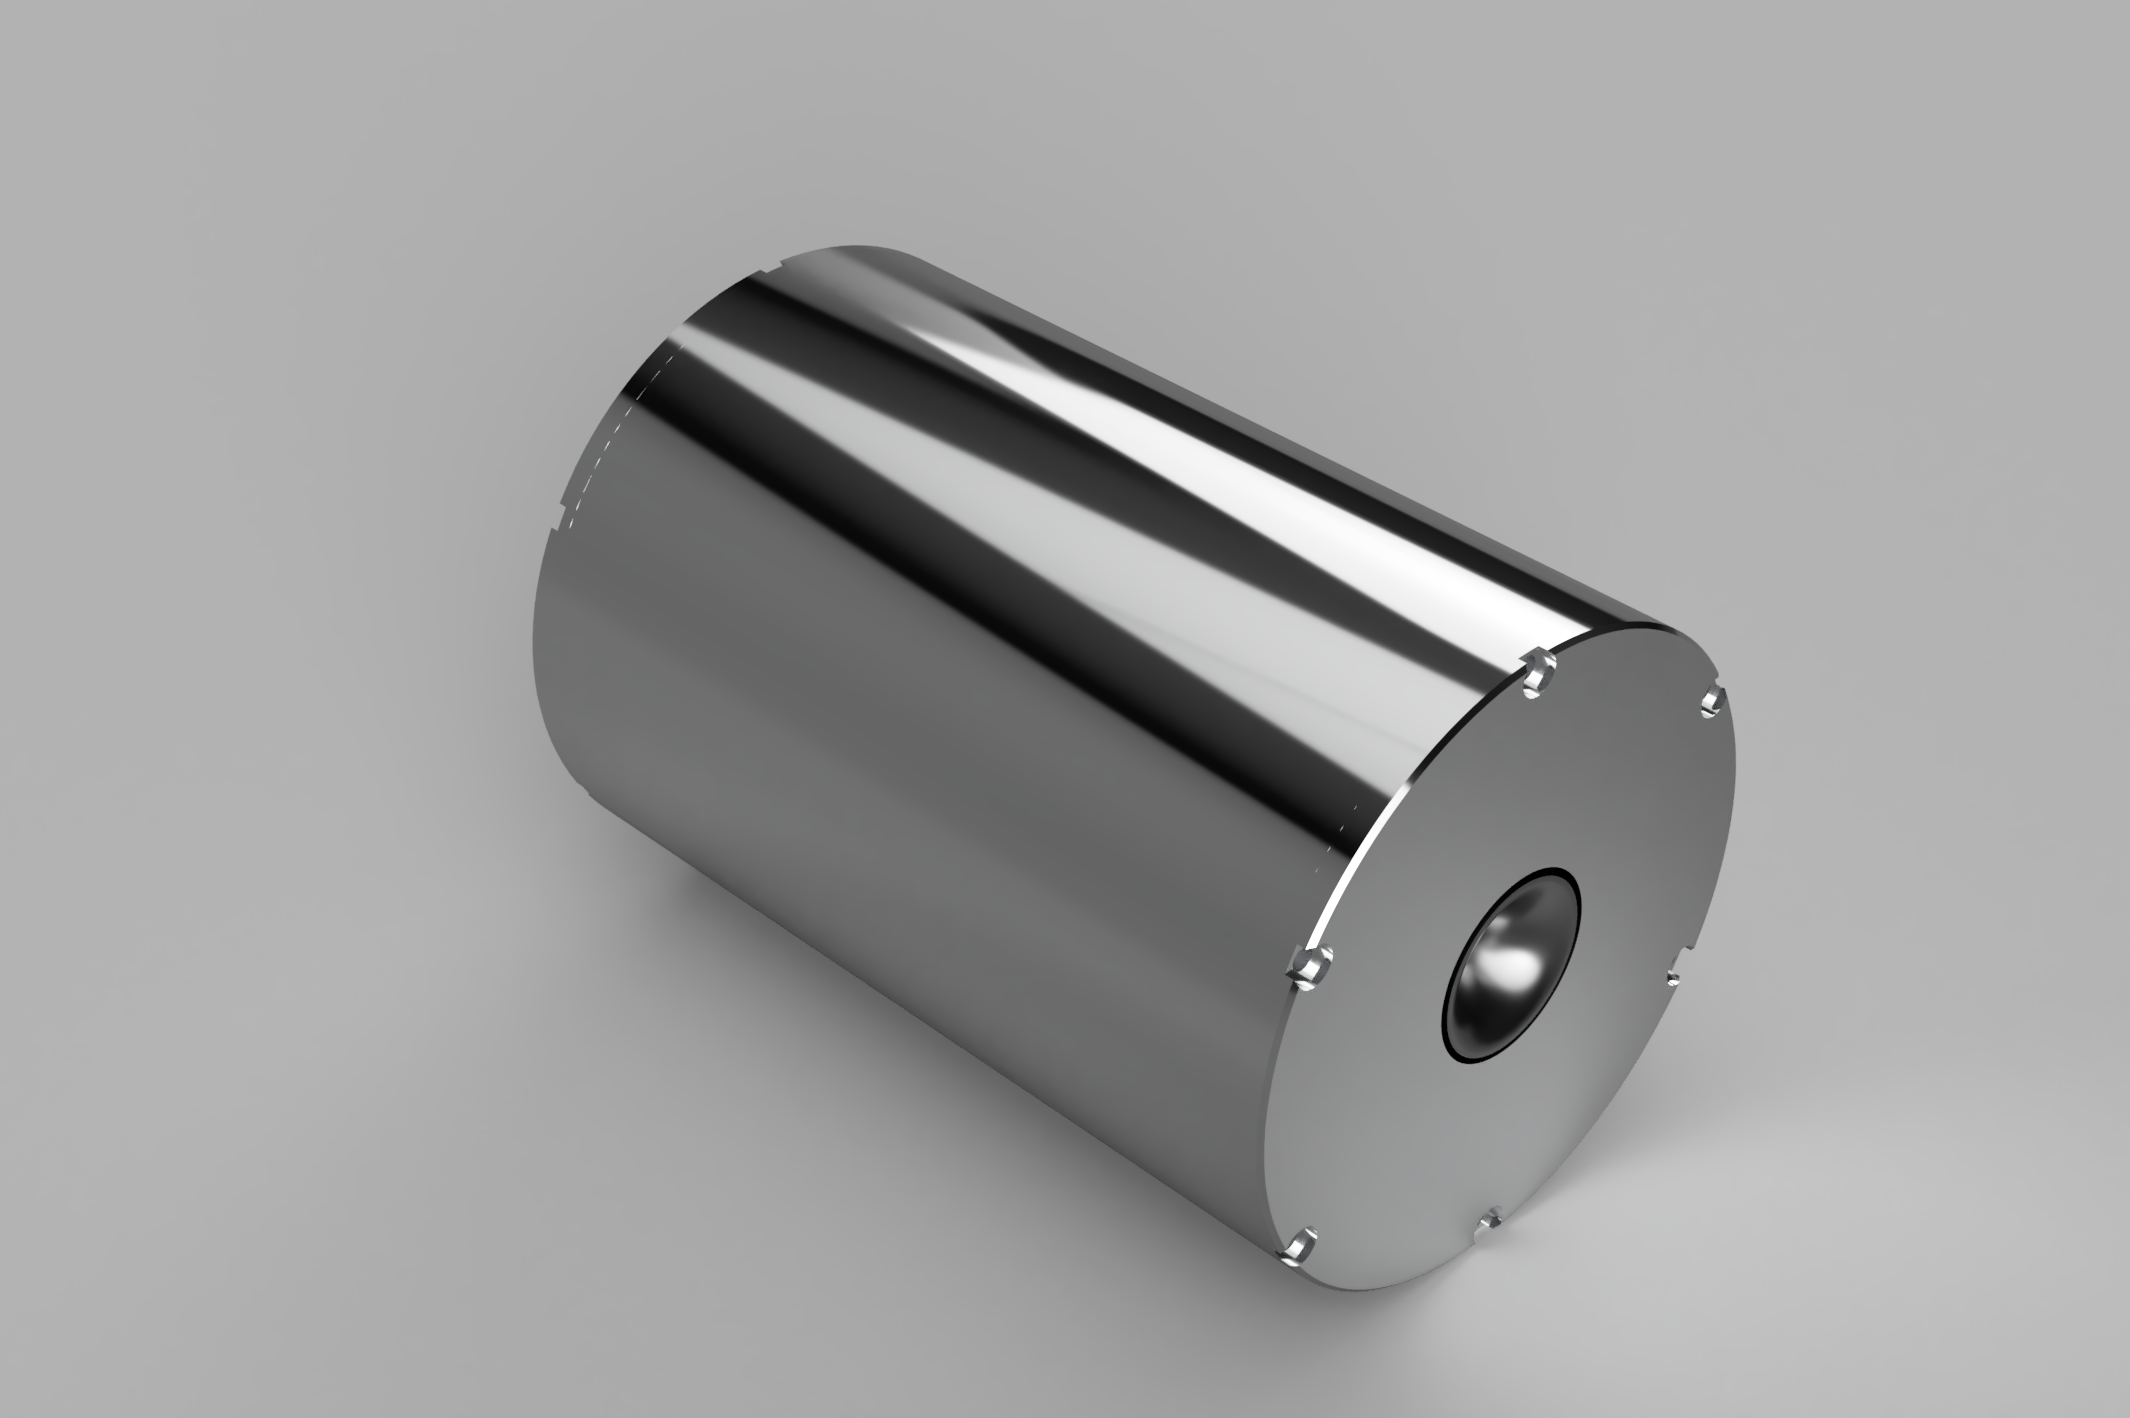
HYBRID DRIVER
A worlds first, a field coil and compression driver with a tractrix horn through the centre pole to provide a trruly full range experience. The machining of this was very intricate as many part had to interface with eachother.
OUR AWESOME CLIENTS
Client Testimonials
Don’t take our word for it – here’s what our clients say:
Epsilon Precision Engineering took my concept and turned it into reality. I was involved in the whole process and felt supported. Björn and his team surpassed my expectation.

Andrew Leon Brown-Stone
ALBS
Epsilon created a world first for me, a deep learning pneumatic system to provide laminar air to my high end turntables. It was a real game changer for us, on time and on budget!

Giuseppe Viola
ET.MAS VYGER
Do you sometimes have the feeling that you’re running into the same obstacles over and over again? Many of my conflicts have the same feel to them, like “Hey, I think I’ve been here before,

John Doe
Company name
Our Team
Our cross positioned multi-disciplinary team are on hand to support you along your journey

Björn Östen
CEO
Björn has over 25 years of working within Engineering and Electronics within the Defence, LEO and High End Audio Sectors

Jacob Miles
Partner Liason
Jacob heads up our inception and sales team, supporting our partners with pricing and programming and also analysing the market to ensure our partners are always getting value.

Gemma Davenport
Marketing and Partner Satisfaction Director
Gemma has over 20 years experience of working with B2B and B2C businesses. Her experience and knowledge has assisted Epsilon to create a service delivery model that is second to none.

Dr Shahzad Yousuf
COO
For over 20 years Dr Shahzad Yousuf has worked across multiple industries providing strategic managment and process creation.
CONNECT WITH US
Contact us
Use the form below to contact us, alternatively if you want some human interaction give us a call on 01794 468 723